
TL;DR:
- Natural DIY hair masks can hydrate, strengthen, and stimulate growth more effectively than commercial products.
- Choosing ingredients tailored to your scalp and hair type is essential for optimal results.
- Consistent application, proper preparation, and routine tracking enhance hair growth outcomes.
You've tried the shampoos, the serums, the expensive salon treatments, and yet your hair still feels like it's growing at a snail's pace. Frustrating, right? Many people spend hundreds of dollars on commercial products only to see minimal results, largely because those products aren't formulated with your specific scalp and hair type in mind. The good news is that DIY hair masks for growth using ingredients like castor oil, avocado, egg, fenugreek, banana, aloe vera, yogurt, and rice water, applied one to two times weekly, can hydrate your scalp, strengthen strands, and stimulate circulation in a way generic products rarely do. This guide walks you through everything: ingredient selection, preparation, application, and tracking your results.
Table of Contents
- Choosing the best natural ingredients for your hair growth mask
- How to prepare your DIY natural hair mask
- Application method and routine for optimal hair growth
- How to troubleshoot, avoid mistakes, and track progress
- A fresh perspective: What most guides overlook about natural hair masks
- Enhance your natural hair mask results with MyHair
- Frequently asked questions
Key Takeaways
| Point | Details |
|---|---|
| Personalized ingredients matter | Choosing the right natural ingredients for your specific hair goals is crucial for effective growth. |
| Proper preparation ensures safety | Mix fresh ingredients carefully and follow hygiene steps for best results and scalp health. |
| Routine drives results | Applying your mask consistently and with correct technique produces measurable hair growth benefits. |
| Track and troubleshoot | Keep a progress record and adjust for better results if you face challenges along the way. |
| Science-backed improvement | Combining natural mask use with AI-powered hair tracking unlocks real progress and lasting hair health. |
Choosing the best natural ingredients for your hair growth mask
Now that you know why natural hair masks can help, let's start by selecting the most effective ingredients for your personal needs. Not all natural ingredients work the same way for every person, and that's the core insight most commercial brands overlook. Your hair might be fine and prone to breakage, or thick and dry with a flaky scalp. Each scenario calls for a different approach.
Popular natural oils for hair growth like castor oil are rich in ricinoleic acid, a compound known to support scalp circulation and reduce inflammation that can inhibit follicle activity. Avocado brings a dense dose of healthy fats and vitamin E, making it ideal for dry, brittle strands that snap easily. Egg yolks are a protein powerhouse, helping to temporarily bond broken cuticles and reduce porosity in chemically treated or heat-damaged hair.
Fenugreek seeds, once soaked and blended, release mucilage, a thick gel-like substance that coats and conditions each strand while supporting healthy scalp pH. Banana provides silica, a trace mineral linked to elasticity and reduced hair shedding. Aloe vera soothes irritated scalps and contains enzymes that clean blocked follicles, a surprisingly underrated benefit. Yogurt introduces lactic acid, which gently exfoliates the scalp and boosts moisture absorption. Rice water, fermented or plain, contains inositol, a carbohydrate that research has linked to strand strength and reduced friction.
Here's a quick comparison to help you match ingredients to your concerns:
| Ingredient | Key Benefit | Best For |
|---|---|---|
| Castor oil | Stimulates scalp circulation | Slow growth, thinning hair |
| Avocado | Deep moisture, vitamin E | Dry, brittle strands |
| Egg | Protein repair | Damaged, high-porosity hair |
| Fenugreek | Scalp conditioning | Flaky or irritated scalp |
| Banana | Elasticity support | Frizzy, breakage-prone hair |
| Aloe vera | Follicle cleansing | Clogged scalp, oily roots |
| Yogurt | Gentle exfoliation | Dull, low-moisture hair |
| Rice water | Strand strengthening | Fine, weak hair |
Combining two or three of these ingredients usually produces better results than relying on any single one. A good starting point for most people is castor oil plus aloe vera plus egg yolk: this trio addresses circulation, cleansing, and protein repair simultaneously. For thicker or curlier hair types, swapping egg for avocado and adding a small amount of fenugreek paste is a strong alternative.
You can also explore best herbs for hair growth like rosemary and amla to layer additional benefits onto your mask base. These herbs contain antioxidants and compounds that support hair follicle health at a cellular level.
Pro Tip: Before applying any new ingredient to your full scalp, apply a small amount to the inside of your wrist and wait 24 hours. This simple patch test can save you from a lot of avoidable irritation, especially with potent ingredients like fenugreek or essential oils. Check out the best hair mask guide for more ingredient combinations based on specific hair concerns.
Understanding hair care insights beyond the basics can also help you make smarter ingredient choices over time.
How to prepare your DIY natural hair mask
With your chosen ingredients in hand, here's how to prepare your mask safely and effectively. Preparation matters more than most people realize. Using the wrong ratios or mixing incompatible textures can reduce effectiveness or even cause buildup on your scalp.

Before you start, gather everything you need:
| Tool/Ingredient | Purpose | Quantity (Single Use) |
|---|---|---|
| Mixing bowl | Combines ingredients | 1 medium bowl |
| Fork or blender | Smooth consistency | 1 |
| Castor oil | Growth support | 2 tablespoons |
| Aloe vera gel | Scalp soothing | 3 tablespoons |
| Egg yolk | Protein treatment | 1 yolk |
| Applicator brush | Even distribution | 1 |
| Shower cap | Heat retention | 1 |
Here's how to prepare a foundational castor oil, aloe vera, and egg yolk mask:
- Separate one egg yolk into your mixing bowl and beat it lightly with a fork until smooth.
- Add two tablespoons of castor oil to the yolk and stir until the mixture begins to blend together.
- Spoon in three tablespoons of fresh aloe vera gel, either scraped directly from a leaf or purchased as pure gel without added alcohol.
- Mix everything together vigorously for about two minutes. A blender works better here if you want a completely lump-free consistency.
- Let the mixture rest for two minutes before applying so the ingredients can begin bonding.
- Use immediately. Do not refrigerate and reuse, because the egg yolk begins to break down quickly once mixed.
Safety is important throughout this process. Always use clean utensils to avoid introducing bacteria into the mixture, especially when eggs are involved. If you're using hair oil for strength, make sure the oil is at room temperature and not warm, because heat can denature the proteins in egg.
Important note about egg-based formulas: Never use hot water to rinse an egg mask from your hair. Hot water cooks the egg proteins and leaves a sticky residue that is extremely difficult to remove. Always rinse with cool or lukewarm water.
For those interested in more creative combinations, homemade oil recipes offer excellent ways to customize your mask base with different carrier oils depending on your scalp's oil production levels.
Pro Tip: Make your mask fresh each time you plan to use it. Natural ingredients without preservatives begin to oxidize and lose potency within hours. Preparing it right before application ensures you get maximum benefit from every use.
If you enjoy using targeted skincare tools, a hydrating sheet mask approach can inspire how you think about full coverage and contact time for your hair treatments too.
Application method and routine for optimal hair growth
Once your mask is ready, it's important to apply it correctly and follow a proven routine. How you put the mask on matters almost as much as what's in it. Rushing through application or missing sections of your scalp dramatically reduces results.
Dos and don'ts:
- Do section your hair into four quadrants before applying, so you don't miss any areas
- Do massage the mask into your scalp using circular motions with your fingertips for at least three minutes
- Do work the mask from roots to ends for full strand coverage
- Don't apply mask to completely dry hair if your strands are very porous; dampen slightly first to help absorption
- Don't use a fine-tooth comb to spread the mask because this can cause breakage while hair is coated and heavy
- Don't leave protein-heavy masks (egg-based) on for longer than 45 minutes, as over-conditioning with protein can actually make hair more brittle
Here is a weekly routine guide you can follow consistently:
- Shampoo your scalp lightly to remove any buildup before applying the mask.
- Gently towel dry so hair is damp, not dripping wet.
- Section your hair into four parts: left front, right front, left back, right back.
- Using an applicator brush, apply the mask generously to your scalp in each section.
- Work the remaining mask down each section of hair to the ends.
- Massage your scalp for three to five minutes to encourage circulation.
- Cover with a shower cap and leave on for 20 to 45 minutes.
- Rinse thoroughly with cool or lukewarm water.
- Follow with a natural conditioner to seal the cuticle after rinsing.
Applied 1-2 times weekly for 20-45 minutes, these masks are proven to hydrate scalp, strengthen strands, and stimulate circulation. Consistency over time is what creates change, not a single exceptional application.
For more foundational approaches, check out these simple ways for growth that complement your mask routine nicely.
Pro Tip: After applying your mask and covering with a shower cap, wrap a warm towel around your head for the first 10 to 15 minutes. The gentle warmth opens the hair cuticle slightly, allowing your natural ingredients to penetrate more deeply into the cortex of each strand.
Follow this mask routine guide closely during your first month to establish a reliable baseline before making any adjustments.
How to troubleshoot, avoid mistakes, and track progress
As you continue using natural hair masks, it's helpful to know how to address challenges and track your hair's progress. Even the best ingredients can underdeliver if you run into common preparation or application pitfalls.
Signs you need to adjust your routine:
- Your scalp feels itchy or shows redness after each use (possible sensitivity to a specific ingredient)
- Hair feels stiff or straw-like after rinsing (too much protein from egg or yogurt)
- You notice buildup or heaviness at the roots even after shampooing (too much castor oil)
- Hair breaks more easily than before starting masks (over-conditioning or wrong ingredient combo)
- No visible change after six to eight weeks of consistent use (routine needs a complete overhaul)
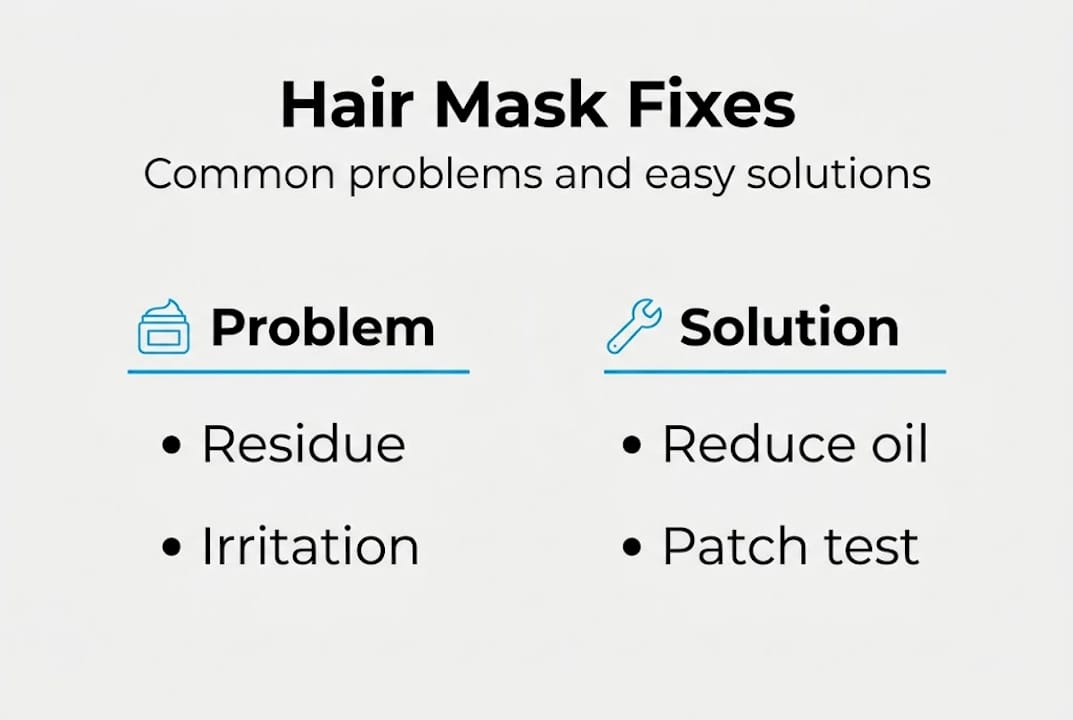
Here are solutions to the most common problems people encounter:
| Problem | Likely Cause | Solution |
|---|---|---|
| Residue after rinsing | Too much castor oil | Reduce to 1 tablespoon, rinse longer |
| Scalp irritation | Fenugreek or essential oil sensitivity | Remove that ingredient, patch test again |
| Hair feels dry post-mask | Not enough moisture ingredients | Add more aloe vera or yogurt to recipe |
| No growth after 8 weeks | Wrong ingredients for hair type | Reassess hair type, try different combo |
| Egg smell lingering | Rinsed with warm water | Always use cool water, add a few drops of lemon |
Mistakes to avoid going forward include applying masks more than twice a week (scalp needs recovery time), combining very acidic and very alkaline ingredients without research, and skipping the scalp massage portion, which is actually one of the most growth-stimulating parts of the whole process.
Pairing your mask routine with a thoughtful natural products guide helps you build a complete ecosystem of care around your scalp health. And if you're dealing with significant shedding or patchiness, exploring hair regrowth remedies designed specifically for regrowth can complement your mask work.
For more intensive cases, professional hair treatment options may provide additional guidance alongside your home routine.
Pro Tip: Start a simple photo journal on the first day you begin your mask routine. Take a consistent photo under the same lighting every two weeks. Over two to three months, these images become far more revealing than trying to recall changes from memory, and they help you fine-tune your approach based on real visual data.
A fresh perspective: What most guides overlook about natural hair masks
Most articles about natural hair masks hand you a generic recipe and call it a day. But here's what those guides rarely say: personalization isn't optional. It's the actual mechanism behind whether a mask works or not. A banana and egg mask might transform one person's hair while making another person's feel like straw. That's not a failure of the ingredients. That's a mismatch in formulation.
The deeper truth is that ingredient synergy matters more than any single powerhouse component. Castor oil alone is good. Castor oil paired with aloe vera and a touch of fenugreek, applied consistently to a well-cleaned scalp, is significantly more effective because each ingredient addresses a different layer of the growth problem: circulation, follicle clarity, and strand condition.
Most guides also treat the mask itself as the entire solution. But the scalp's daily environment, how you sleep, your water quality, your stress levels, all feed into whether those 30 minutes of mask time pay off. Consistent scalp care between mask sessions through gentle brushing, light oil maintenance, and stress management is what makes the difference between slow progress and noticeable change.
As one hair wellness practitioner once noted, the people who see real results don't just try a recipe. They experiment, they observe, and they adjust. Tracking your natural growth methods over time gives you data, and data beats guesswork every single time.
Enhance your natural hair mask results with MyHair
If you want to take your natural hair journey further, MyHair offers digital tools to maximize your mask results.

MyHair's AI-powered hair scan analyzes your scalp and strand condition in minutes, giving you objective data that helps you understand exactly which ingredients your hair needs most. Instead of guessing whether your issue is moisture, protein, circulation, or something else entirely, you get a clear picture backed by science. The analysis onboarding process is quick and accessible, making it easy to get started even if you've never tracked your hair health before. Over time, your personalized hair score helps you connect your mask routine to measurable improvements, so every DIY session you complete is working smarter, not just harder.
Frequently asked questions
How often should I use a natural hair mask for growth?
Use your mask 1-2 times per week for best results, allowing your hair and scalp time to recover between treatments.
Which ingredient is best for boosting hair growth?
Castor oil, fenugreek, and aloe vera are among the most effective options, and applied regularly in masks they work to stimulate circulation and strengthen hair at the root.
Can natural masks repair damaged hair and encourage new growth?
Yes, regular mask use hydrates your scalp and strengthens strands, creating the conditions needed to support new hair growth over consistent weeks of treatment.
Are homemade masks safe for sensitive scalps?
Most natural masks are gentle and well-tolerated, but always patch-test any new ingredient on your wrist 24 hours before applying it to your scalp to prevent irritation or unexpected reactions.
What is the best way to measure progress from using hair masks?
Taking consistent photos every two weeks under the same lighting, combined with tracking scalp health and strand thickness, gives you the clearest picture of how your routine is working over time.